Python
jupyter notebook 主题安装
1 | pip install jupyterthemes |
ubuntu 22.04 pygame 修复
python 3.10
新建 /usr/lib/dri 目录并进入, 创建软链接
sudo ln -s /usr/lib/x86_64-linux-gnu/dri/iris_dri.so iris_dri.so
sudo ln -s /usr/lib/x86_64-linux-gnu/dri/swrast_dri.so swrast_dri.so
更新 libstdcxx-ng , 切换到 python3.10环境 并执行
conda install libstdcxx-ng=12.1.0
Julia 安装配置
直接下载二进制版本 解压 .bashrc添加Path 环境变量即可
https://mirrors.tuna.tsinghua.edu.cn/julia-releases/bin/linux/x64/1.8/
添加 jupyter notebook
1 | using Pkg |
添加画图包
1 | Pkg.add("Plots") |
jupyter 中画图弹出 百度网盘。。。
https://blog.csdn.net/dscn15848078969/article/details/120689517
1 | vim ~/.config/mimeapps.list |
在百度网盘 html 配置下添加 chrome html 配置
1 | text/html=baidunetdisk.desktop |
似乎每次打开百度网盘就会覆盖第一条配置 第二条配置 会覆盖第一条
conda 相关命令
查看已经安装的虚拟环境
1 | conda info --env |
新建一个虚拟环境
1 | conda create --name YOUR_PYTHON_NAME python=PYTHON_VERSION_NUMBER |
删除虚拟环境
1 | conda remove -n YOUR_PYTHON_NAME --all |
激活虚拟环境
1 | conda activate YOUR_PYTHON_NAME |
关闭激活的环境
1 | conda deactivate YOUR_PYTHON_NAME |
字体问题。。。
1 | import matplotlib |
Ubuntu 20.04 python3.9 matplotlib 的 plt.show()无法正确显示 窗口卡死
我们新创建一个环境 python 3.91
2
3
4
5
6
7
8
9
10
11
12
13
14
15
16
17
18
19
20
21
22
23
24
25
26
27
28
29
30
31
32
33
34
35
36
37
38
39
40
41
42
43
44
45
46
47
48
49
50
51
52
53
54
55
56
57
58
59
60
61
62
63
64
65
66Collecting package metadata (current_repodata.json): done
Solving environment: done
## Package Plan ##
environment location: /home/qinjin/anaconda3/envs/testQt
added / updated specs:
- python=3.9
The following packages will be downloaded:
package | build
---------------------------|-----------------
_libgcc_mutex-0.1 | main 3 KB https://mirrors.ustc.edu.cn/anaconda/pkgs/main
_openmp_mutex-4.5 | 1_gnu 22 KB https://mirrors.ustc.edu.cn/anaconda/pkgs/main
ca-certificates-2021.10.26 | h06a4308_2 115 KB https://mirrors.ustc.edu.cn/anaconda/pkgs/main
certifi-2021.10.8 | py39h06a4308_0 151 KB https://mirrors.ustc.edu.cn/anaconda/pkgs/main
ld_impl_linux-64-2.35.1 | h7274673_9 586 KB https://mirrors.ustc.edu.cn/anaconda/pkgs/main
libffi-3.3 | he6710b0_2 50 KB https://mirrors.ustc.edu.cn/anaconda/pkgs/main
libgcc-ng-9.3.0 | h5101ec6_17 4.8 MB https://mirrors.ustc.edu.cn/anaconda/pkgs/main
libgomp-9.3.0 | h5101ec6_17 311 KB https://mirrors.ustc.edu.cn/anaconda/pkgs/main
libstdcxx-ng-9.3.0 | hd4cf53a_17 3.1 MB https://mirrors.ustc.edu.cn/anaconda/pkgs/main
ncurses-6.3 | h7f8727e_2 782 KB https://mirrors.ustc.edu.cn/anaconda/pkgs/main
openssl-1.1.1l | h7f8727e_0 2.5 MB https://mirrors.ustc.edu.cn/anaconda/pkgs/main
pip-21.2.4 | py39h06a4308_0 1.8 MB https://mirrors.ustc.edu.cn/anaconda/pkgs/main
python-3.9.7 | h12debd9_1 18.6 MB https://mirrors.ustc.edu.cn/anaconda/pkgs/main
readline-8.1 | h27cfd23_0 362 KB https://mirrors.ustc.edu.cn/anaconda/pkgs/main
setuptools-58.0.4 | py39h06a4308_0 790 KB https://mirrors.ustc.edu.cn/anaconda/pkgs/main
sqlite-3.36.0 | hc218d9a_0 990 KB https://mirrors.ustc.edu.cn/anaconda/pkgs/main
tk-8.6.11 | h1ccaba5_0 3.0 MB https://mirrors.ustc.edu.cn/anaconda/pkgs/main
tzdata-2021e | hda174b7_0 112 KB https://mirrors.ustc.edu.cn/anaconda/pkgs/main
wheel-0.37.0 | pyhd3eb1b0_1 33 KB https://mirrors.ustc.edu.cn/anaconda/pkgs/main
xz-5.2.5 | h7b6447c_0 341 KB https://mirrors.ustc.edu.cn/anaconda/pkgs/main
zlib-1.2.11 | h7f8727e_4 108 KB https://mirrors.ustc.edu.cn/anaconda/pkgs/main
------------------------------------------------------------
Total: 38.4 MB
The following NEW packages will be INSTALLED:
_libgcc_mutex anaconda/pkgs/main/linux-64::_libgcc_mutex-0.1-main
_openmp_mutex anaconda/pkgs/main/linux-64::_openmp_mutex-4.5-1_gnu
ca-certificates anaconda/pkgs/main/linux-64::ca-certificates-2021.10.26-h06a4308_2
certifi anaconda/pkgs/main/linux-64::certifi-2021.10.8-py39h06a4308_0
ld_impl_linux-64 anaconda/pkgs/main/linux-64::ld_impl_linux-64-2.35.1-h7274673_9
libffi anaconda/pkgs/main/linux-64::libffi-3.3-he6710b0_2
libgcc-ng anaconda/pkgs/main/linux-64::libgcc-ng-9.3.0-h5101ec6_17
libgomp anaconda/pkgs/main/linux-64::libgomp-9.3.0-h5101ec6_17
libstdcxx-ng anaconda/pkgs/main/linux-64::libstdcxx-ng-9.3.0-hd4cf53a_17
ncurses anaconda/pkgs/main/linux-64::ncurses-6.3-h7f8727e_2
openssl anaconda/pkgs/main/linux-64::openssl-1.1.1l-h7f8727e_0
pip anaconda/pkgs/main/linux-64::pip-21.2.4-py39h06a4308_0
python anaconda/pkgs/main/linux-64::python-3.9.7-h12debd9_1
readline anaconda/pkgs/main/linux-64::readline-8.1-h27cfd23_0
setuptools anaconda/pkgs/main/linux-64::setuptools-58.0.4-py39h06a4308_0
sqlite anaconda/pkgs/main/linux-64::sqlite-3.36.0-hc218d9a_0
tk anaconda/pkgs/main/linux-64::tk-8.6.11-h1ccaba5_0
tzdata anaconda/pkgs/main/noarch::tzdata-2021e-hda174b7_0
wheel anaconda/pkgs/main/noarch::wheel-0.37.0-pyhd3eb1b0_1
xz anaconda/pkgs/main/linux-64::xz-5.2.5-h7b6447c_0
zlib anaconda/pkgs/main/linux-64::zlib-1.2.11-h7f8727e_4
Proceed ([y]/n)?
可以看到默认有tk库 没有pyqt5
示例程序1
2
3
4
5
6
7
8
9
10
11
12
13
14
15
16
17import numpy as np
import matplotlib
# matplotlib.use("TkAgg")
print(matplotlib.get_backend())
import matplotlib.pyplot as plt
if __name__ == "__main__":
x = np.arange(1,11)
y = 2 * x + 5
plt.title("Matplotlib demo")
plt.xlabel("x ")
plt.ylabel("y ")
plt.plot(x,y)
plt.show()
我们先注释掉 matplotlib.use(),运行程序,显示默认的后端为 Agg。
Agg 是无法显示交互窗口的,
所以可以设置 matplotlib.use("TkAgg")
后端TKAgg应该可以显示交互窗口,然而实际上只输出一个空白窗口并卡死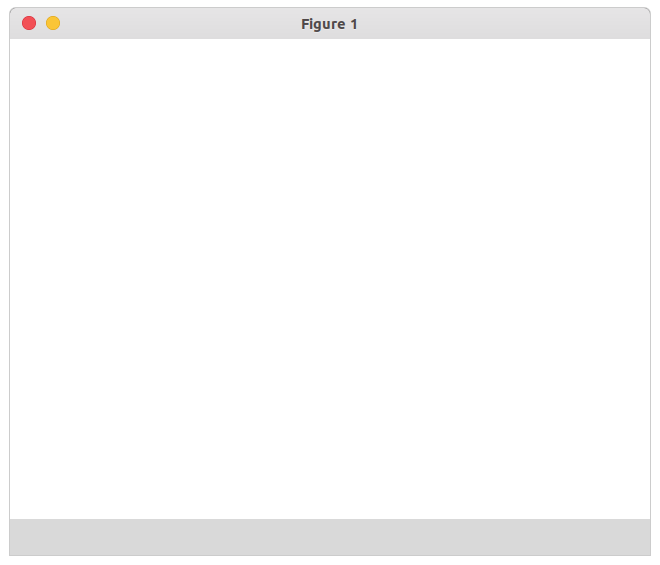
解决方法是安装pyqt51
pip install pyqt5
并在代码中使用 QtAgg 或 Qt5Agg 后端1
2matplotlib.use("QtAgg")
# 或者 matplotlib.use("Qt5Agg") 也可以
交互式窗口就会弹出, 完全没问题 并且可以关闭不会卡死
问题解决!
当然 一劳永逸的办法是在 .bashrc 中为matplotlib 设置后端
1 | MPLBACKEND=Qt5Agg |
这样就不需要再在每个python文件中设置了(也可以在 matplotlibrc 中设置,但是考虑的多个环境,每个都改太麻烦,还是改bashrc方便)
总结 1.pip install pyqt5 2..bashrc设置 MPLBACKEND=Qt5Agg
https://blog.csdn.net/xovee/article/details/100930583
https://blog.csdn.net/qq_27825451/article/details/82732675
jupyter 链接远程服务器
服务器端1
2
3sudo apt install pip3
pip3 install jupyter
jupyter notebook --ip=服务器IP
客户端
把服务器端给的地址复制到浏览器就行。。。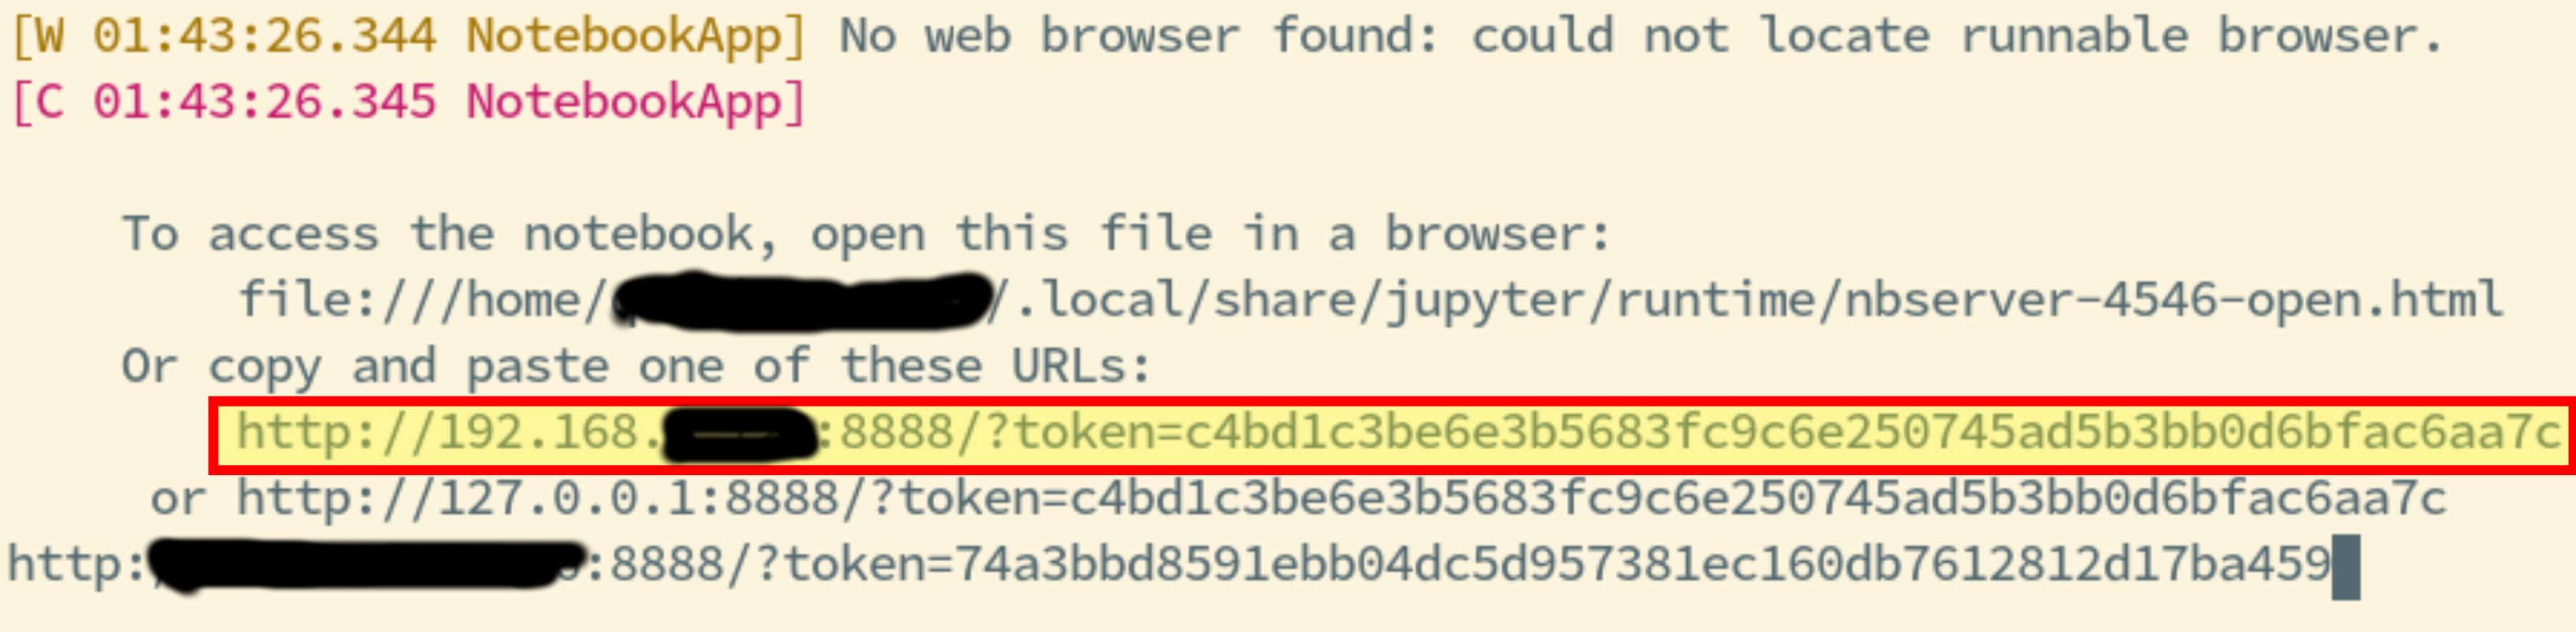
手动安装 python 包及其卸载
1 | cd PACKAGE_DIR |
—prefix=INSTALL_DIR 可有可无,自定义的安装目录
卸载的时候就把 files.txt 中的文件全部删除就行了
1 | cat files.txt | xargs rm -rf |
pip 清理安装缓存
1 | rm -rf ~/.cache/pip |
jupyter 安装卸载内核
安装
1 | conda activate YOUR_PYTHON_ENVIRONMENT |
—user 不加的话会报错[Errno 13] Permission denied: '/usr/local/share/jupyter/kernels
加了 sudo 也没用 /usr/bin/python: No module named ipykernel 不知道为什么,我切换了环境,用的解释器还是 /usr/bin/python
加了之后安装到 Installed kernelspec python2.7 in YOUR_HOME_DIR/.local/share/jupyter/kernels
其中,kernelname为创建的文件夹名,showname为在Jupyter notebook展示的内核名
如果 kernelname 不同 而 showname 相同 则会在 notebook显示两个相同的 新建选项
查看已经安装的内核1
jupyter kernelspec list
卸载内核
1 | jupyter kernelspec remove kernelname |
jupyter 插件安装
1 | pip install jupyter_contrib_nbextensions && jupyter contrib nbextension install --user |
(其实似乎只需要 pip3 install jupyter_contrib_nbextensions 就行? 不太懂)