Ubuntu 搭建 Hexo 博客(butterfly 主题)
环境 Ubuntu 18.04
嵌入 html
1.在source 文件夹下新建 html 文件夹, 将需要导入的html 文件放到这里面
2.修改 _config.yml 文件 添加 skip_render: html/* 以避免hexo重复渲染 html
3.以下语句可以将 your.html 嵌入到博客中 于是可以愉快的把 vim 导出的代码 html 文件 发布到博客上了
1 | <iframe src="/html/your.html" height="500px" width="100%" scrolling="auto" frameborder="0" style="box-shadow: 0px 0px 20px -10px #888;"> |
4 但是容易出 bug 还是最好不要嵌入。。。
安装nodejs以及npm
1 | curl -sL https://deb.nodesource.com/setup_14.x | sudo -E bash - |
安装完成 提示你用以下代码安装 nodejs 和 npm
1 | sudo apt-get install -y nodejs |
查看 nodejs 以及 npm 版本
1 | nodejs --version |
这种比ubuntu软件源的要新,也可以google一下其他安装方式,选择适合自己的安装方法
hexo 本地博客创建及预览
安装hexo1
npm install -g hexo-cli
创建本地博客文件夹并初始化,安装组件1
2
3
4mkdir your_blog
cd your_blog
hexo init
npm install
生成网站并启动本地服务器进行预览1
2
3
4
5
6
7
8
9
10
11
12hexo g hexo s ``` 访问 http://127.0.0.1:4000/, 出现 hexo 的默认界面 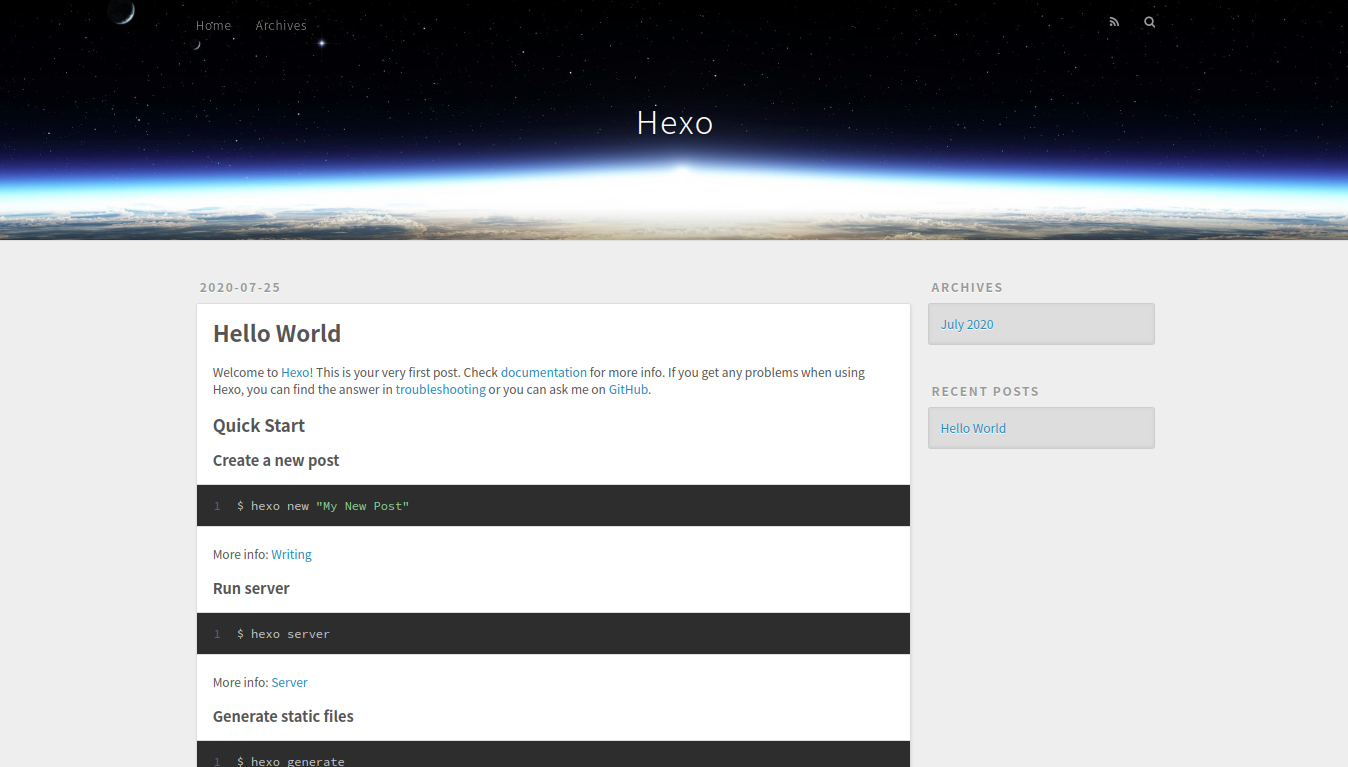 恭喜你,本地博客初步完成! 如果4000端口被占用,可以使用 ```bash hexo server -p 5000 ```
更换端口为 5000 进行预览
## 部署到 Github Pages
### 注册 github 并设置 ssh key
如果你没有github 可以先去注册一下, 注册完成后终端运行
```bash
git config --global user.name "your_github_name"
git config --global user.email "your_github_email"
设置你的github用户名和邮箱
之后使用你的邮箱创建ssh key
1 | ssh-keygen -t rsa -C "your_github_email" |
默认回车就好
根据提示的存放ssh key的地址, 你可以找到 id_rsa.pub 公钥文件 将文件中的内容复制 登陆 GitHub ,进入 Settings 页面,选择左边栏的 SSH and GPG keys,点击 New SSH key 把你复制的公钥粘贴到 Key 下面的框里 点击 Add SSH key 完成添加 终端输入 bash ssh -T git@github.com 出现”Are you sure…”, 输入yes 确认, 出现 “Hi your_github_name! You’ve successfully authenticated, but GitHub does not provide shell access.” 证明你已经连接成功了! ### 创建 github 仓库,开启Github Pages 创建一个新仓库 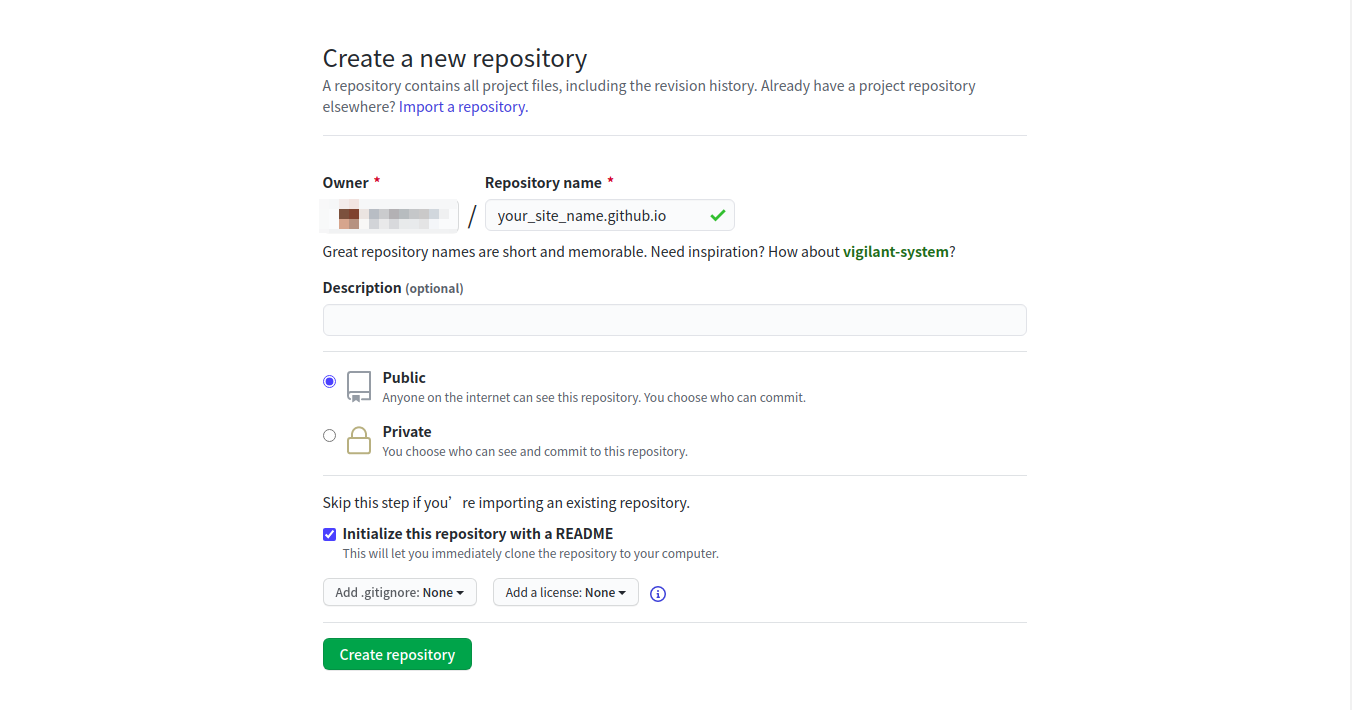 进入你仓库的Setting界面(不是你头像下拉栏的Setting!) 往下翻到Github Pages 界面
 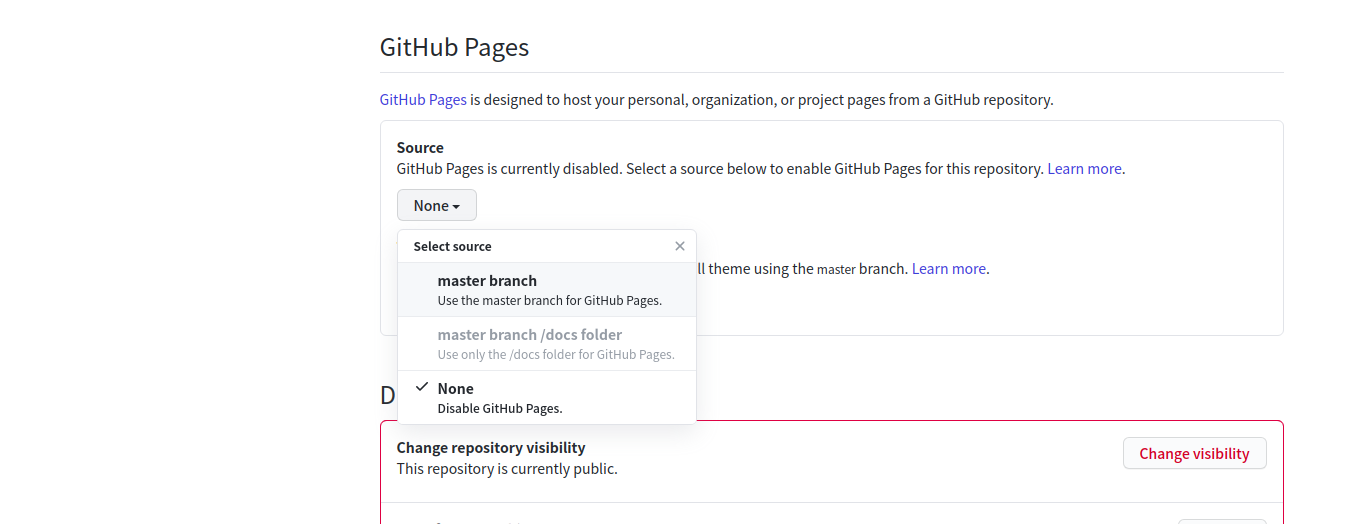 点击master branch开启Github Pages 分配的博客地址为 https://your_github_name.github.io/your_site_name.github.io 如果你的github仓库名(也就是你存放博客的地方)与你的github账户名一致 那么你的地址会简洁很多: https://your_site_name.github.io 不过我的github的账户名已经用于创建另一个仓库了, 所以就只能用第一种 更改域名可以参考网上的其他教程 这里就不再说了 ### 配置本地 hexo github deploy 安装 hexo-deployer-git ```bash npm install hexo-deployer-git —save
这是因为没有配置_config.yml 编辑_config.yml 发现URL这块需要设置你的博客地址
并且如果你是像我一样github用户名跟博客仓库名不同的话 需要将root 设置为 /your_site_name.github.io/
1 | # URL |
运行 hexo g -d 重新生成博客并部署 应该就可以了
butterfly 主题配置
官方文档网站
https://demo.jerryc.me/
大多数问题可以在上面找到 以下的配置也可以在官网找到
默认的主题是landscape 我不是很喜欢 所以用了butterfly主题
安装以及配置
在博客根目录下1
git clone -b master https://github.com/jerryc127/hexo-theme-butterfly.git themes/butterfly
在_config.yml中更改主题1
theme: butterfly
安装渲染器1
npm install hexo-renderer-pug hexo-renderer-stylus --save
主要注意的点是要把主题的配置文件_config.yml 复制到博客根目录的source中的_data目录下
(如果不存在就自己创建一个)并将文件名改为 butterfly.yml 之后有关主题的配置都会在这个文件中修改
运行 hexo g -d 你应该可以看到更换了主题的博客了
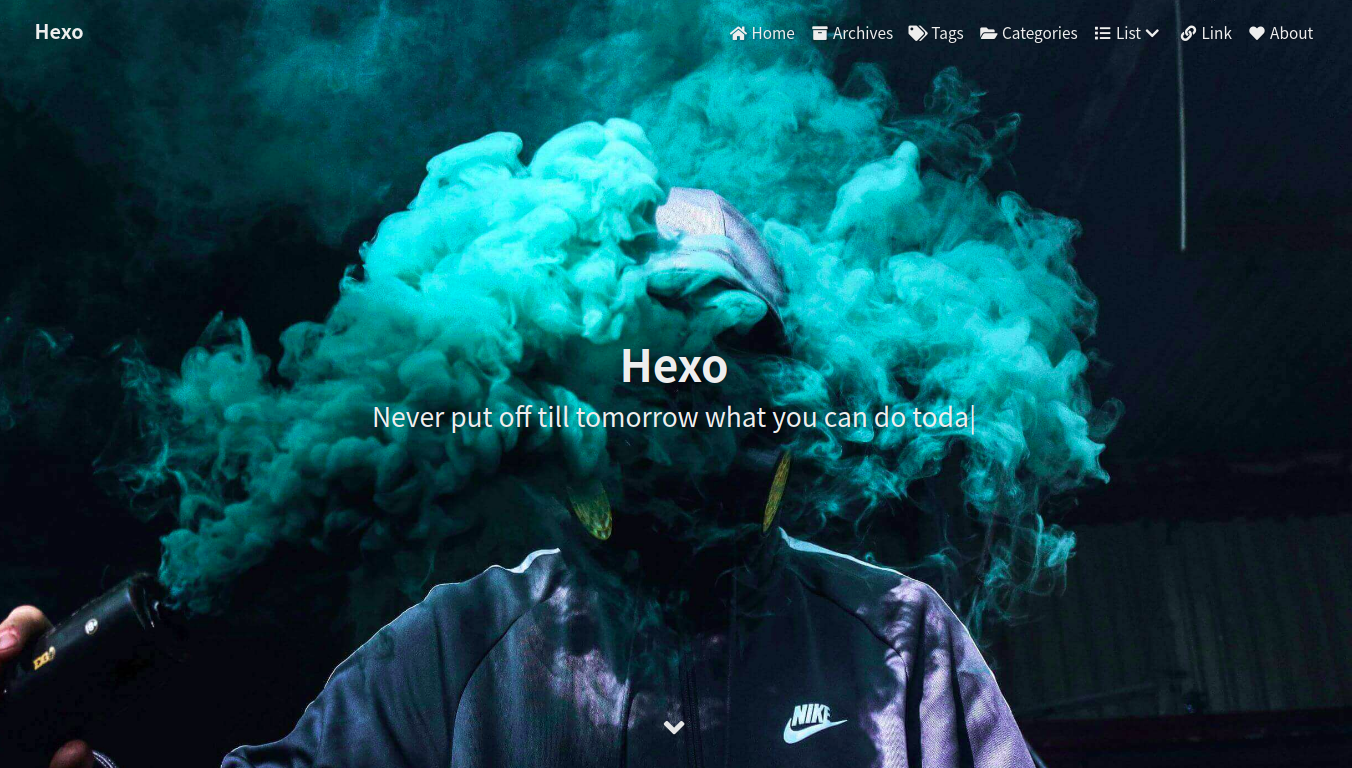
更换主页图片
在butterfly source的 img 中添加图片 your_image 并在
butterfly.yml 中设置 index_img1
index_img: /img/your_image
配置 gitalk 评论区
开启gitalk
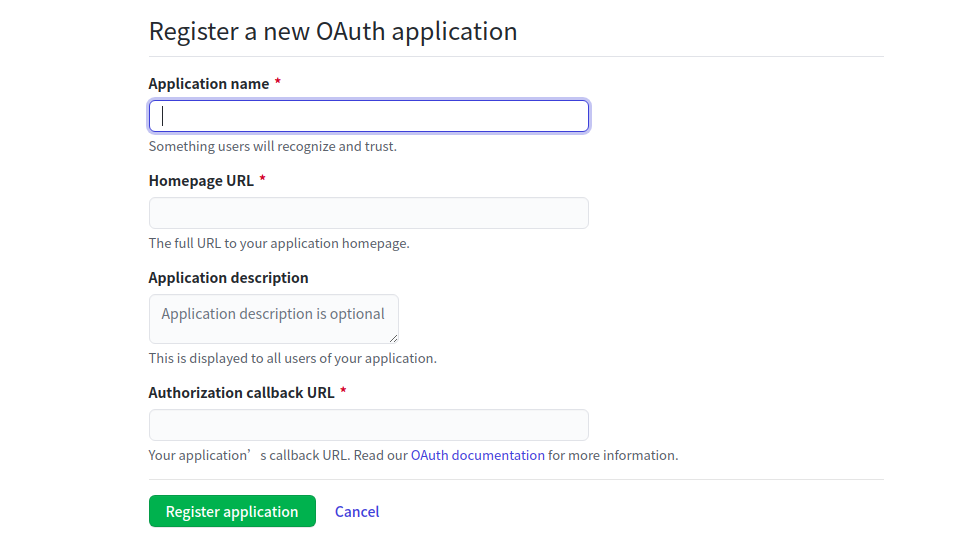
登陆 GitHub ,进入 Settings 页面,选择左边栏的Developoer settings,点击 OAuth Apps 点击 New OAuth App
Homepage URL 和 Authorization callback URL 填主页地址 其他随便填 点击 Register application 完成
需要把Client ID 和Client Secret 填写到butterfly.yml gitalk配置的相应位置
配置评论区的注意事项
在butterfly.yml中设置
1 | # gitalk |
yml文件里的repo需要填 仓库名而不是地址!!!! hexo 解析的时候会使用 admin/repo 去定位仓库的位置。admin/repo 才是仓库的地址。
比较容易犯错的地方是 repo 填了 your_github_name/your_site_name.github.io 这样的名字,注意,repo 只需要填仓库名字,不需要加拥有者,拥有者放到 admin 里面。
当然,你不用这个博客库也可以,可以新建一个仓库单独将评论存放在issues里。
参考: https://blog.csdn.net/qq_33384402/article/details/107200465
修正Mathjax与默认渲染器冲突的问题
先卸载原来的渲染器, 安装新的渲染器
1 | npm uninstall hexo-renderer-marked --save |
并在文件node_modules\kramed\lib\rules\inline.js中修改1
2
3
4//escape: /^\\([\\`*{}\[\]()#$+\-.!_>])/, 第11行,将其修改为
escape: /^\\([`*\[\]()#$+\-.!_>])/,
//em: /^\b_((?:__|[\s\S])+?)_\b|^\*((?:\*\*|[\s\S])+?)\*(?!\*)/, 第20行,将其修改为
em: /^\*((?:\*\*|[\s\S])+?)\*(?!\*)/,
部署到vercel 的一些问题
vercel( https://vercel.com )可以在官网build 并部署博客, 而且可以免费更改域名.而且好像也没有出现公式渲染错误的问题. 部署过程很简单,不再赘述, 只记录遇到的问题
1.直接复制githubpages 的库部署上去后布局变乱
注意hexo deploy只会部署 public 文件夹到github, 然而vercel部署需要线上build 所以需要用github单独将整个博客文件夹上传到一个库. 这个库才是vercel 部署用的库, 而不是用hexo deploy上传的那个库. 然后检查_config.yml里的url和root目录是否正确
2.部署后无法显示图片
之前我是用了插件1
npm install https://github.com/CodeFalling/hexo-asset-image --save
并在_config.yml中设置 post_asset_folder实现的相对引用, vercel 的貌似没有这个插件 所以在source 文件夹下新建文件夹 images 使用绝对引用
1 |  |
好了, 博客搭建到此结束,如果你还有更多问题,可以去google问一下哈哈哈. 我也会把在使用中的问题记录到该博客中. To be continue --->
部分内容已经过时,因为 butterfly 已经更新。
参见butterfly 官网